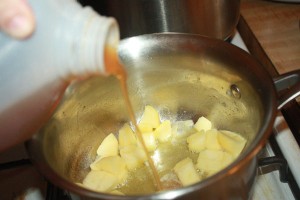
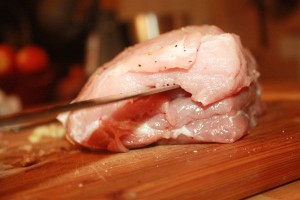
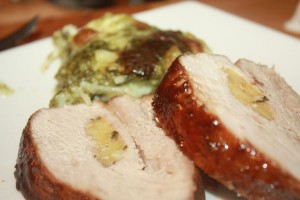
Cocoa Rubbed Pork with Smothered Onions

It’s been a warm November, but this weekend there was a distinct chill in the air. What better way to warm up than cocoa? So here’s another great roast for the slow cooker.

cocoa rubbed pork roast

cocoa rubbed pork roast

I adapted this for the slow cooker from an oven roast recipe for Bon Apetite. The original recipe required a slow cooked oven roast, with the onions sauteed separately on the stovetop. The slow cooker method allows you to cook the onions and the roast together, with less moisture for a more concentrated flavor, and the onions help keep the pork roast extremely tender.

Cocoa Rubbed Pork
1 3-4lb center cut pork roast
1 1/2 tbsp unsweetened dark cocoa powder
3-4 cardamom pods, toasted and crushed
1 tsp cloves, ground
1 tsp peppercorns, coarsely ground
1 tsp nutmeg, ground
1 tbsp ground cinnamon
1 tbsp sea salt

Smothered Onions
2 medium yellow onions
2 tbsp butter
2 tbsp olive oil
1 tbsp sage leaves, chopped
1 cup chicken broth

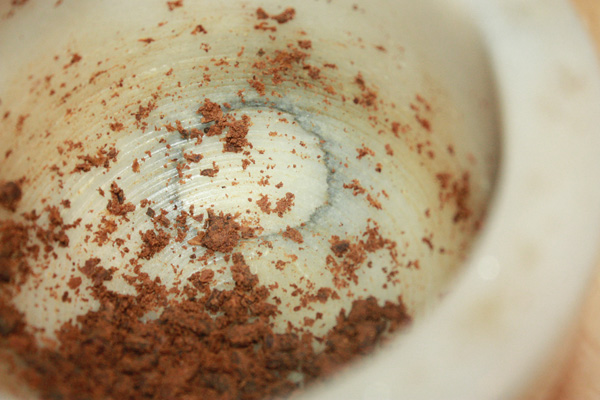
First, prepare your rub. Toast cardamom pods in an ungreased pan over medium heat for 2-3 minutes, tossing frequently. Using a mortal and pestle  (or a spice grinder), crush cardamom pods, peppercorns and cloves.

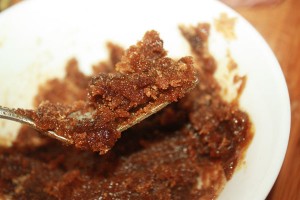
crushed spices

crushed spices

In a small bowl, mix the cardamom, peppercorns and cloves with the cocoa, nutmeg, cinnamon and sea salt.  Wash and pat dry pork. Rub all sides with the spice mixture.  Set aside.

Peal onions and slice thinly with a knife or mandolin. Roughly chop sage leaves. Heat oil and butter in a wide saute pan over medium heat. Add onions and saute until tender and translucent, 5-7 minutes.  Add chopped sage and broth, cover, and cook for 5 minutes.

Pour onions and broth into slow cooker. Place roast on top of onions, and cook until roast reaches an internal temp of 160F (approximately 3-4 hours on high, or 5-6 hours on low). Remove roast from slow cooker to plate and let meat rest 10 minutes.

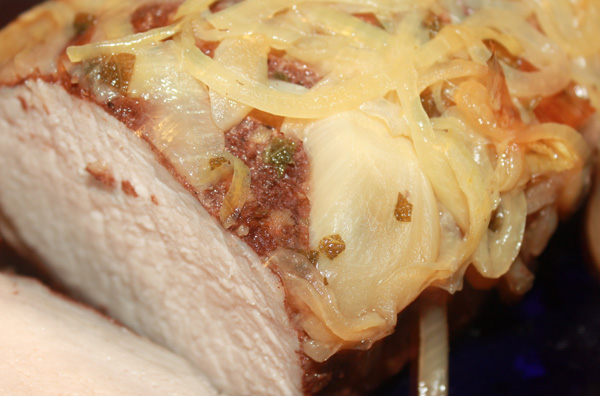
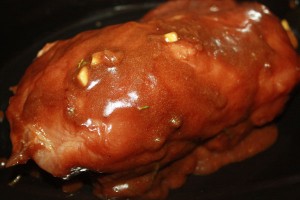
smothered onions on roast pork

smothered onions on roast pork

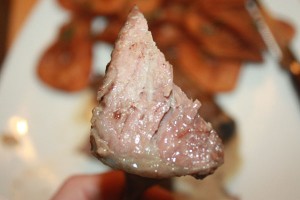
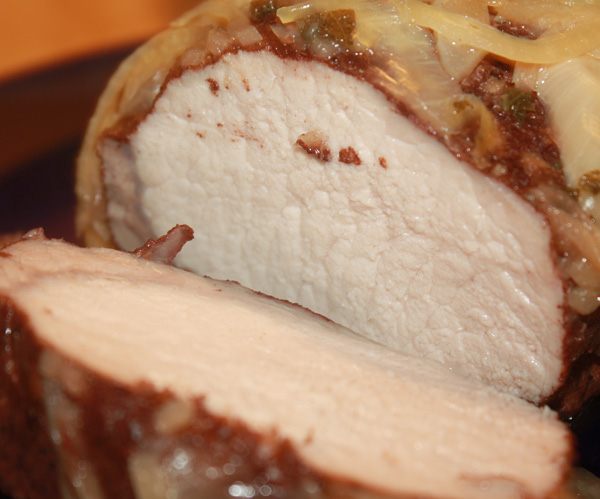
Cover the pork roast with onions and slice onto plates.

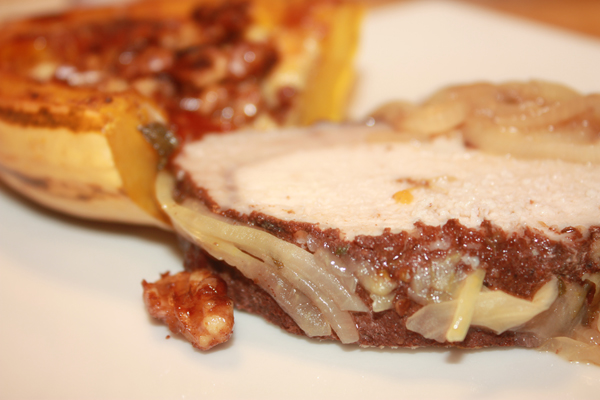
slice of cocoa roast pork

slice of cocoa roast pork

Posted in cooking | Tagged , , | Leave a comment

DIY Chalkboard Spice Jar

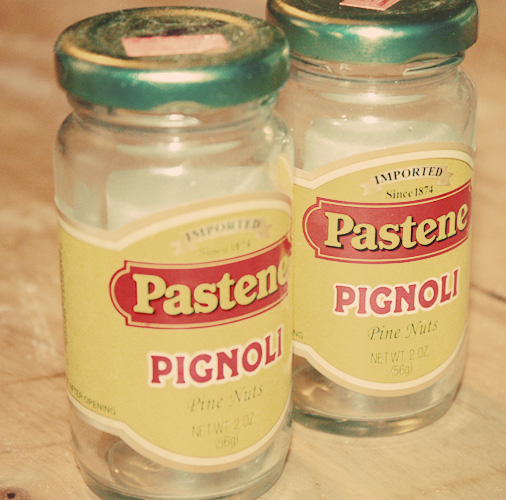
Last week I took a look at salt & pepper sets. This week, I went ahead and created my own with a pair of pine nut jars, chalkboard paint, and elbow grease.

spice jars: before

spice jars: before

Let the bottles sit in hot water. Remove the label with your fingertips or a scrubber. If you find the label glue is still sticking around, rub a bit of olive oil into the glue, and then scratch off.

jars, labels removed

jars, labels removed

Tape the jars. I left a blank line on the jar so you can keep track of how full your jar is, and you could even add measurement lines (tablespoons, ounces, etc).

taped jars

taped jars

Give the jars 2-3 coats of chalkboard paint with a foam brush. The foam brush will leave less brush marks. Each coat should dry 40 minutes – 1 hour before you add the next.

Once the last coat is dry, and you can see no large spots by looking inside the jar and holding it up to a light source, prime the chalkboard paint by rubbing the chalkboard surface with the side of a piece of chalk. I use a gray chalk to prime, as it matches the chalkboard color better.

blackboard paint salt and pepper shakers

blackboard paint salt and pepper shakers

Since these were not originally spice jars, I painted the lids white, and drilled holes into the top. This will work well for any empty spice jars you might have, and the chalkboard paint label will let you re-label your jars with ease. Now I’m tempted to paint labels on all my countertop jars.

spice jars, after

spice jars: after

Posted in decor | Tagged , , | 2 Comments

Coq For Two

Oh la la, file this under romantic dinners for two.

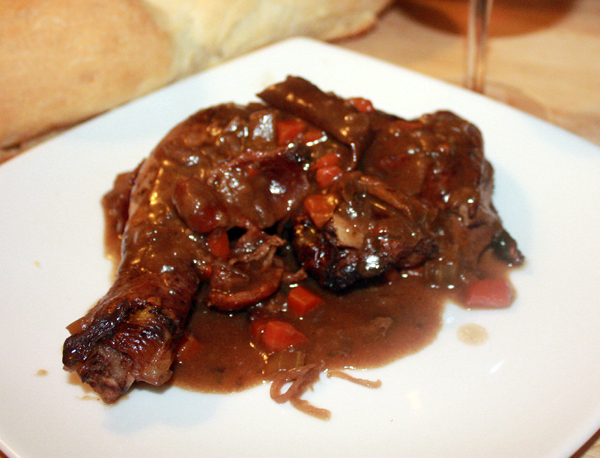
coq au vin for two

coq au vin for two

I saw a recipe for “Quick Coq au Vin” in last month’s Bon Appetite, which is a shame, because this is not a difficult dish. I’ve also seen (and been served, eeks!) lots of variations with white wine. I do enjoy a buttery white wine sauce, but that ain’t no coq au vin. The red wine marinade and mushrooms give this a lovely beefy flavor.

A traditional coq au vin requires a whole bird (rooster, specifically), cut up for marinating and frying. A traditional coq au vin would also marinate the bird in burgundy, but since I’m not in France and I don’t have batches of home-made table wine kicking around (someday, right?), I picked up a $5 bottle of Portuguese Vinho Tinto at Jerry’s.  So, here is my less-than-traditional, but not blaspheming, go-to Coq Au Vin. For Two.

Coq Au Vin for two

2 leg quarters, or 1.5 lbs chicken parts, skin on
4 cups red wine
4 slices thick-cut bacon,
2 tbsp butter
1 small onion, finely sliced
2 celery stalks, diced
2 carrots, diced
2 cloves garlic, minced
1/4 cup dried porcini mushrooms
2 tbsp flour
salt

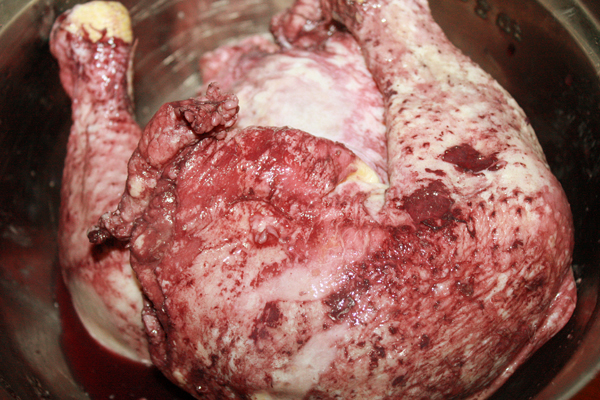
Rub salt into the skin of chicken. Place chicken in a shallow bowl or roasting pan and cover with red wine. Refrigerate and marinate overnight, turn a few times during the next day if you’re able.

marinated chicken

marinated chicken

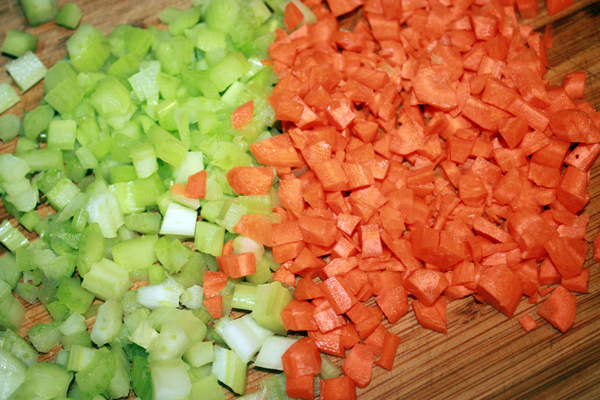
Prep and dice all your vegetables.

diced celery and carrots

diced celery and carrots

Pour 1 cup steaming hot water over dried mushrooms and let soak for 20 minutes.

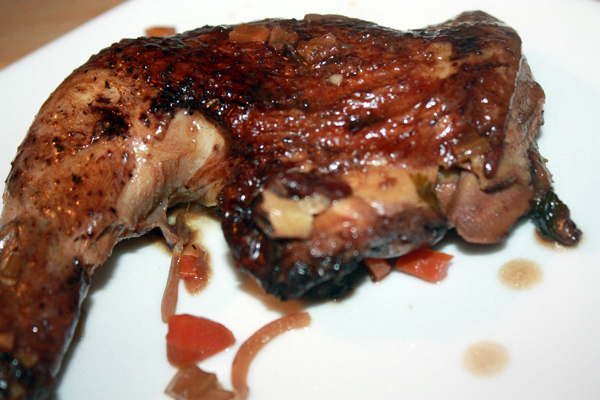
Cook bacon in a large saute pan until slightly crisp, then move to paper towel to drain. Remove chicken from wine with tongs, reserving wine. Brown chicken in bacon grease, skin side down to start, on each side, about 6-8 minutes. Remove pan from heat. Chop bacon into 1 inch slices.

browned chicken

well browned chicken

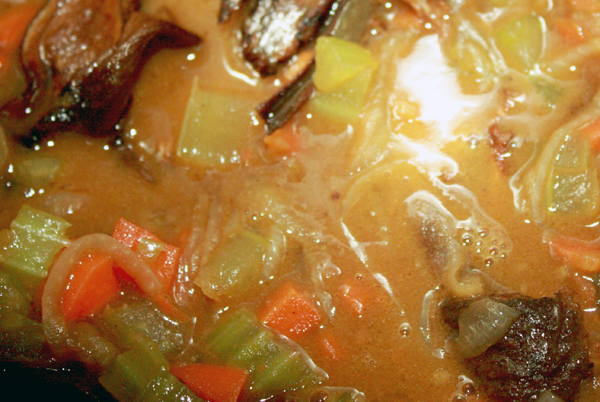
Heat butter in stock pot over medium heat. Add onions and saute  until translucent, 5-8 minutes. Add celery and carrots, simmer 10 minutes, and continue stirring.  Add garlic, stir for 2-3 minutes, then add mushrooms and broth. Pour wine over vegetables, bring to simmer. Add chicken and parsley. Simmer covered for 30 minutes – after 20 minutes, add bacon.

vegetables simmering in wine and broth

vegetables simmering in wine and broth

Use tongs to remove chicken to plate. Add 2 tablespoons flour, stir until absorbed. Simmer uncovered for 5 minutes. Spoon sauce over chicken and serve.

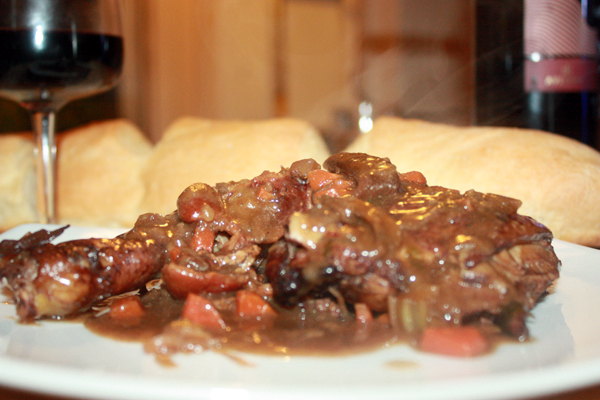
coq au vin

coq au vin - serve with wine and bread!

Posted in cooking | Tagged , , , | 3 Comments

Marmalade Sticky Buns with Orange Bitters Frosting

Sticky buns are always so tempting at the cafe counter- gooey, dripping with brown sugar filling and sugar frosting. But, they are also an invitation for a sugar coma. As much as I love sweet, I usually want something a bit more savory first thing in the morning. Here’s my compromise between sweet buns and bitter orange.

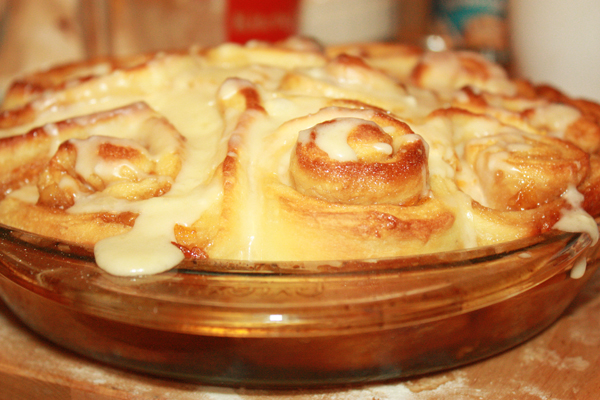
sweet rolls

sweet rolls

I love the slight bitterness of an orange marmalade. And, while thinking about the rinds that add that bitterness, I thought of cocktail bitters. Specifically, the bottle of Angostura orange bitters sitting on my liquor shelf. I grabbed that bottle impulsively and added it to the frosting, and I couldn’t have been happier with the results.

Sticky buns require a yeast dough, so if you’re planning on making these for a weekend brunch, make the dough the night before and let rise in a covered bowl in the refrigerator.

Marmalade Sticky Buns with Orange Bitters Frosting
makes approx 20-24 rolls

Dough
1 package or 2 1/4 tsp active dry yeast
1/2 cup sugar
2 cups milk
1/2 cup butter (1 stick), cut into tablespoons
2 eggs
4 1/2 cups flour, plus extra for dusting
1/2 tsp baking powder
1/2 tsp baking soda
1/2 tbsp salt

Filling
10 ounce jar orange marmalade
1 cup brown sugar

Frosting
2 cups confectioner’s sugar
2 tbsp melted butter
2 dashes orange bitters
2 tbsp orange juice

Bring milk and 1/2 cup sugar to 110F-100F in a sauce pan over medium heat. While heating, stir to dissolve sugar. Once 110F is reached, remove from heat and add yeast. Let rest for 5 minutes. During this time, the yeast should bubble up.

In a large mixing bowl,  stir together flour, baking powder, baking soda and salt. Pour yeast mixture into the flour, and knead (or mix with a dough hook) until well combined. Add butter 1-2 tablespoons at a time, until worked in. Beat in eggs, and knead until dough is elastic with a slight sheen.  Cover and let rise until doubled – 4 hours, or overnight in the refrigerator.

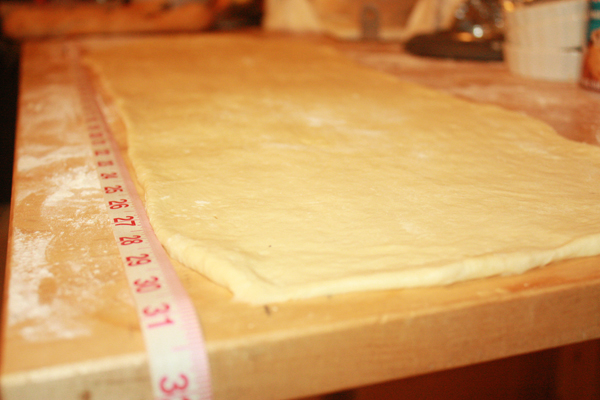
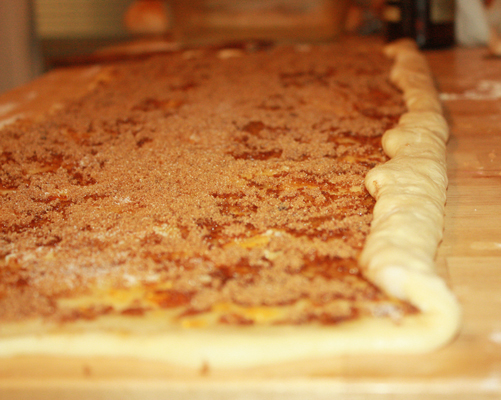
Punch down dough and turn onto a well-floured surface. Roll out to 1/4 inch thick, in a large rectangle approximately 30 inches by 15 inches.

sticky bun dough

dough rolled out

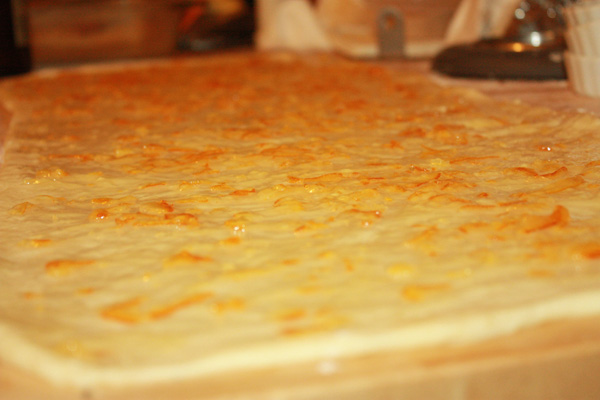
Spread marmalade across surface of dough.

marmalade on dough

marmalade on dough

Sprinkle brown sugar on top of marmalade. Pinch up the long edge of the dough

pinched dough

pinched dough

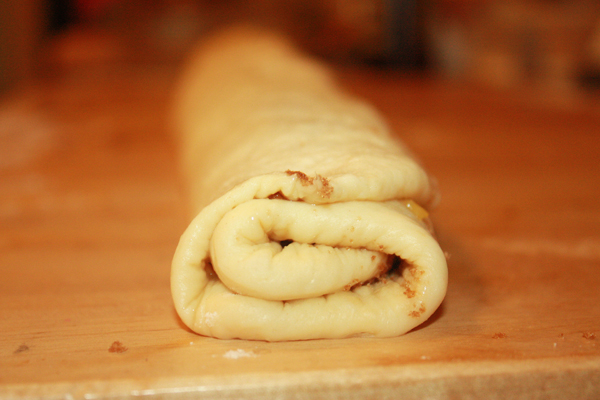
and roll tightly into one long log.

rolled dough

a less than tight roll

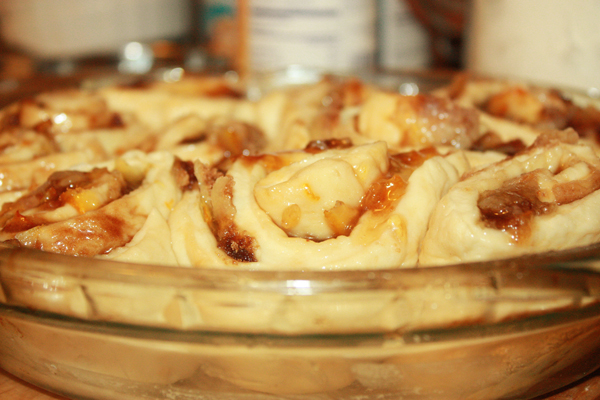
Slice log into 1 inch rolls. Pack tightly into two 9 inch round pie plates, lightly greased. Let rise again, in a warm draft-free place, for about 40 minutes.

buns packed into pie dish

tightly packed buns

Bake at 375F for 18-20 minutes, until filling is melted and edges just barely browned. While baking, mix your glaze. In a mixing bowl, whisk orange juice, bitters and melted butter into confectioner’s sugar, and set aside.

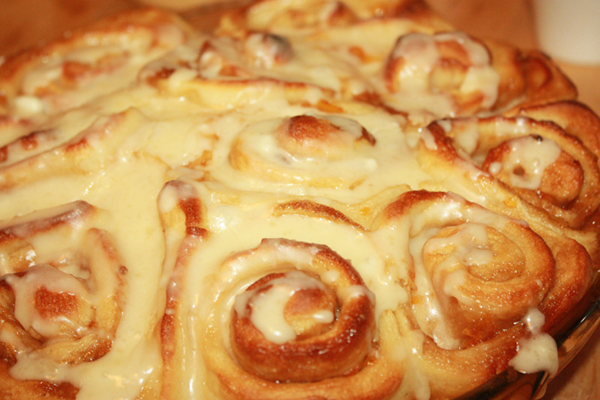
When rolls are done baking, set on cooling rack. Allow to cool 15 minutes (if you can). Brush on glaze and serve.

Now, having made these rolls in glass pie plates and dealt with the cleanup, I would be tempted to make this in disposable aluminum tins next time. Did I mention they are worth the effort and cleanup anyway? So very worth it.

marmalade sweet rolls

marmalade sweet rolls with orange bitters frosting

Posted in cooking | Tagged , | 1 Comment

Apple Brandy Apple Butter

I did a bad thing. Well, a very good thing in terms of flavor. I added Apple Jack to my most recent batch of apple butter.

apple brandy apple butter

apple brandy apple butter

For the last two years, I’ve been going to Apple Crest Farms in NH for my birthday, which generally falls around Columbus Day weekend. Not only do they have a lovely variety of apples to choose from, they have a petting zoo, a market full of jams and cider and other goodies, farm-fresh ice cream, a cider donut booth, and live bluegrass.

They are kid-friendly (box not required)

kate apple picking

kate the great

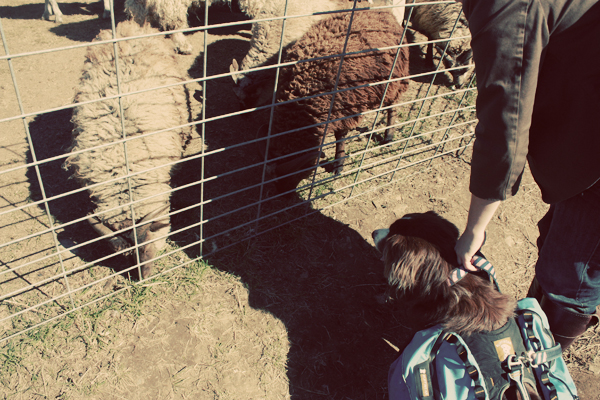
dog friendly (though Clara wanted to direct the petting zoo pen)

clara at the petting zoo

must... herd...

and their ice cream makes you make this face.

ice cream face

fuck yeah ice cream

I came back with about 15 lbs of apples, a mix of Macintoshes and Cortlands. I should have come back with 30, as I’m already out. But I do have 6 pints of apple brandy apple butter, which will last me a few months if I don’t gift them away. These are almost too tasty to share.

Apple Brandy Apple Butter
7 lbs apples
1 1/2 cup apple cider
1 cup sugar
1 tbsp cinnamon
2 tsp fresh ground cloves
2 tsp nutmeg
3 oz apple jack or calvados

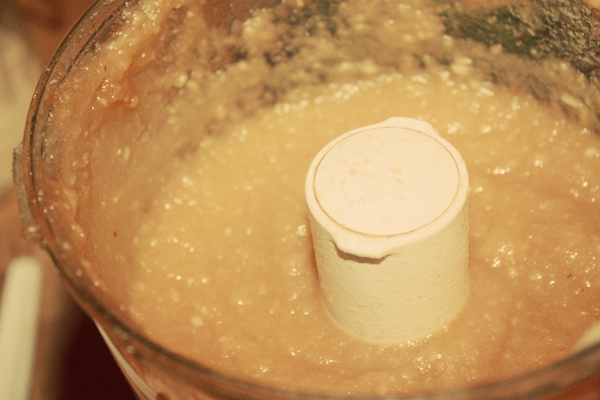
Peel, core and roughly chop apples. In a wide pot, slowly simmer apples with cider on the lowest possible heat while still keeping a simmer. Stir enough to prevent apples from scorching or browning. Your goal is for the apples to soften enough that they can be smushed easily with a potato masher, about 30-45 mins. Rough them up with the masher, then puree – if you have a food mill, you’re in luck.  Alternately, you can use an immersion blender or puree in your food processor. At this point, you should have something the consistency of applesauce.

apple sauce

apple sauce

Now season and cook down further to apple butter, a jam-like consistency. Add apple puree, sugar, cinnamon, cloves, nutmeg and apple jack to your slow cooker. With lid slightly ajar, program slow cooker for 6 hours on low. If you don’t have a slow-cooker, you can do this on the stove top. Keep on low heat, and simmer uncovered for 4-6 hours, stirring every 30-45 minutes.

As always, pack hot into clean jars, leaving 1/2″ headspace. Wipe your rims and tighten bands over lids firmly. Process 20 minutes in a water bath, or 10 minutes at 8psi in a pressure canner. Store in a cool, dark place. Possibly one with a lock.

Posted in canning | Tagged , , , | 3 Comments

Rosemary Potato Chips

Yesterday’s recipe for Cider Braised Short Ribs raised a question from a friend – how did you make those chips?

plated beef ribs

cider braised ribs with gravy

It’s really quite easy. It’s not a healthy version by any means, but perfectly crispy chips are the reward. Using a well-seasoned cast iron is the key. Well, that and a lot of oil.

My basic steps are slice, parboil, fry, season. If you’re looking for extra flavor, infuse a veg oil with sprigs of rosemary for 2-3 days beforehand and then use for frying.

3 large yukon gold potatoes
sea salt
rosemary
1 liter vegetable oil
table salt (for boiling)

Bring oil to 360F over medium heat in a cast iron dutch oven. I have found heating the oil over medium heat instead of high allows me to maintain a constant temp while frying, and the first batch doesn’t end up scorched.

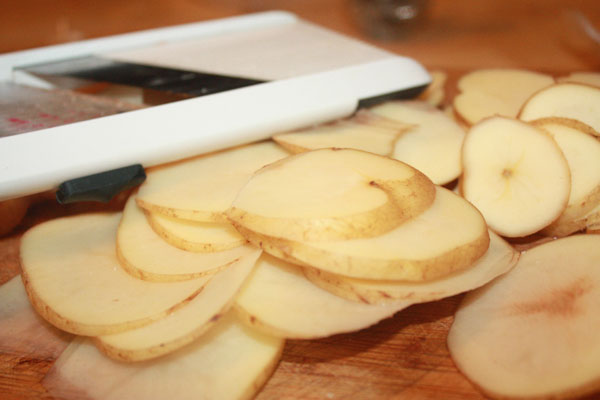
Cut potatotoes in half, then slice thinly, about 1/8 inch thick. Using a mandonlin will make this quick work.

potatoes sliced using a mandolin

slicing with the mandolin

Bring water in a large saucepan or stockpot to a boil. Salt the water generously. Add sliced potatoes and bring to a boil for 2 minutes- no more! Strain potatoes and douse with cold water to prevent them from cooking any further.

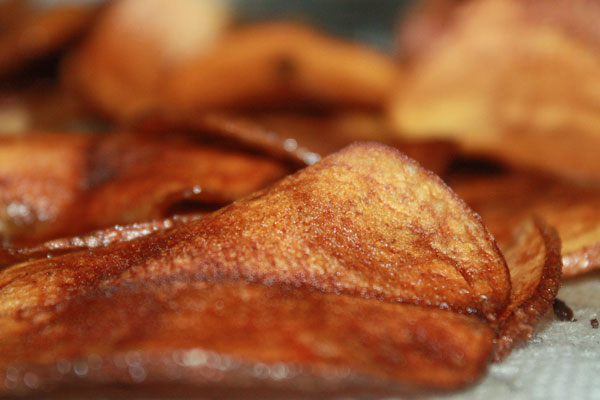
Make sure you have a drying rack or plate ready with paper towels to dry your chips. Add potatoes to oil, now heated to 360F in your cast iron, in small batches using a skimmer or tongs. Adding too many chips at one time will lower your oil temp and make it harder to maintain a consistent temp. Turn or flip every 30 to 45 seconds to make sure they brown evenly on both sides. Once they are a nice deep brown, about 2 minutes, remove to drying rack with paper towels. Repeat as necessary to finish all chips.

fried potato chips

fried potato chips

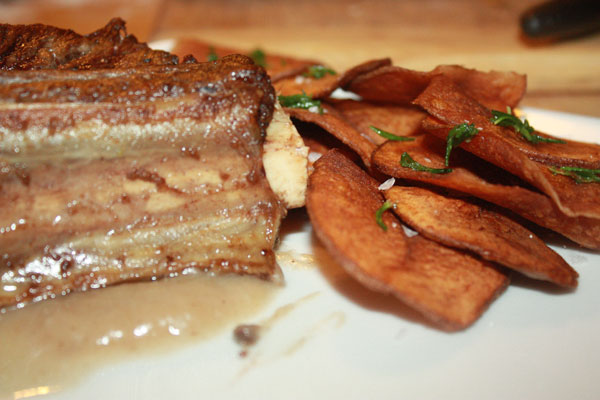
In a large bowl, toss chips with sea salt and finely chopped rosemary. Serve with your favorite meat dish, or as a snack.

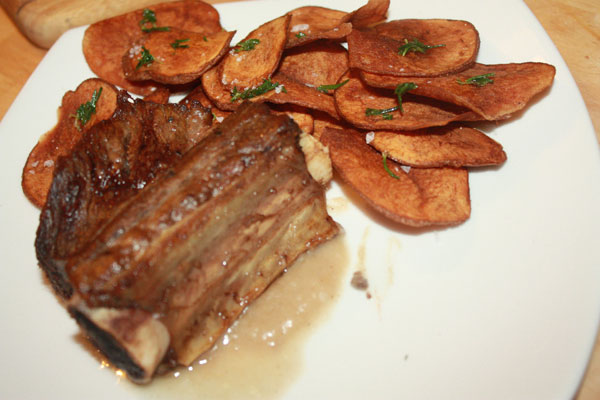
braised beef rib with rosemary chips

braised beef rib with rosemary chips

Posted in cooking | Tagged , , | 1 Comment

Cider Braised Short Ribs

braised beef rib with rosemary chips

braised beef rib with rosemary chips

I don’t cook beef often. I grew up eating a lot of grizzly, burnt steak that has turned me (unfairly) against red meat. I do appreciate a nice piece of rare meat on occasion, though it’s something I like to order at a restaurant more often than cook myself. So, I wanted to create a simple beef meal that even a steak-phobic cook like me couldn’t mess up.

tender beef

tender beef, success!

Cider Braised Short Ribs

4 beef short ribs
1/2 cup apple cider
1 star anise
1/2 tsp peppercorns
1/2 tsp whole cloves
2 tbsp butter, divided
1 tbsp olive oil
1 tbsp sifted flour

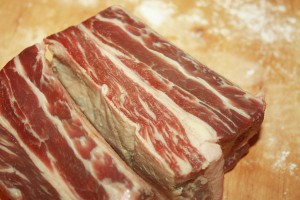
beef short ribs

beef short ribs

Wash ribs, pat dry, season with salt and pepper. In a large saute pan, melt 1 tbsp butter and oil over medium high heat, until bubbles start to dissolve. Brown the ribs on all four sides – searing quickly for 1- 2 mins per side, using tongs to turn over.

Deglaze the pan with the cider. Place the ribs into the slow cooker, and scrape the brown bits with the cider and pour over ribs. Toss in your seasonings (peppercorns, cloves, star anise) and cook to internal temp of 145, or about 1  to 1 1/2 hour on high.

Once the meat is cooked, place on a cutting board or plate to rest. In a small saucepan, make a quick roux of 1 tbsp butter and 1 tbsp flour over medium-low heat. Once the roux is well combined but not too dry, pour the cider mix from the slow cooker through a sieve (to catch the cloves and star anise) into the pan. Stir until the gravy is an even consistency. If your gravy is too thick, you can thin it with a dash of cider.

Spread 2 tbsp gravy onto each plate, and place rib over the gravy. Serve with potatoes of your choice.

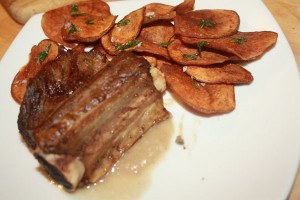
plated beef ribs

cider braised ribs with gravy

Posted in cooking | Tagged , , , | 2 Comments

The Great Salt & Pepper Shake Up

I’ve been looking for a salt & pepper shaker for a few months, not particularly on the hunt, but I’ve yet to find something that has grabbed my fancy. So many sets veer too far towards kitsch, or are completely plain. Here’s a few that I’ve found online that are certainly nicer than the rest.

Posted in decor | 1 Comment

Brown Sugar Roast Pork with Apple Stuffing

I’ve been getting a lot of mileage out of my slow cooker this fall: chili, pulled pork, and several roasts.  The slow cooker saves on my gas bill, and because I have a model with a built-in meat thermometer, it’s fairly fool proof. Add your meat and marinade before you leave for work or errands, set the correct internal temp, and leave it.

I was fidgeting a bit with an existing recipe for brown sugar glazed pork so it would work in the slow cooker.  Also, I was trying to use up some leftover apples and cider. I decided to caramelize the apples and use them as a stuffing. A savory fruit stuffing adds a nice contract to the roast, and it’s a really beautiful presentation when you’re slicing these to the plate.

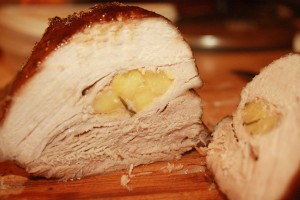
pork roast sliced

apple stuffing

I used a sirloin cut roast, but this will work with a tenderloin or other cut, so long as it’s 4-6lbs and a few inches deep. Larger roasts will take a bit longer, but since we’re working with a slow cooker, you don’t need to worry about the exact time.

1 4-6lb pork roast (center cut, tenderloin, etc)

Glaze:
1 cup dark brown sugar, plus 2 tbsp
1 tbsp dijon-style mustard
1 tbsp balsamic vinegar
1 tsp fresh grated nutmeg

Stuffing:
2 medium apples
1 1/2 tbsp butter
1/4 cup apple cider
2 tsp fresh chopped rosemary

Peel and chop to apples into 1/2 inch cubes. Add butter into a sauce pan over medium heat. When butter has melted, add apples and stir for a few minutes, until apples have barely softened.  Add cider and cook until reduced a bit, then mix in chopped rosemary . Remove from heat; allow to cool to room temp.

making apple stuffing

Wash roast and pat try. Rub with salt and pepper.  Using a long knife, slit the roast in the center. Cut on each end, and then carefully press through the center until both cuts meet.

Take apple mixture and spoon into the hole you’ve slit in the roast. Mix brown sugar, mustard, balsamic vinegar, and nutmeg in a small bowl. The texture will be grainy but moist. Rub all over pork.

brown sugar glaze

Place roast in slow cooker. Take any remaining apples and cider, and pour over roast.

brown sugar glazed pork

ready for the slow cooker

Depending on your slow cooker settings and how much time you have, you can cook on high (around 3-4 hours for a 4lb roast) or low (around 6-8 hours for a 4lb roast) until you reach an internal temp of 160F. Your slow cooker should switch to “warm” mode after the internal temp has been reached.

Remove from slow cooker and allow meat to rest for 5 minutes.  While the meat is resting, take remaining 2 tbsp of brown sugar and rub over top of pork. This should melt on its own.  Cut into 1″ thick serving slices.

brown sugar roasted pork with apple stuffing

all done, with potatoes and spinach gratin

Posted in cooking | Tagged , , , | 2 Comments

Cider Beignets with Maple Sugar

A few months ago Boston was sponsoring a food truck contest; they would help the winning business with loans and other assistance. I daydreamed a bit, but didn’t submit an application. It was fun to create an imaginary menu —  something Cajun inspired, sourced with New England ingredients.  This mash-up of beignet and cider donut was probably the best idea, so I worked on a basic recipe and ran a few test batches.
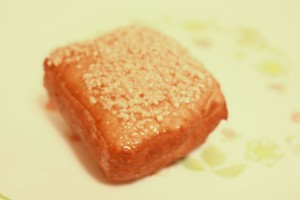
cider beignet with maple sugar

It’s a tough job, but I was willing to tackle it. I was fortunate to have a Louisiana native on hand to assist and test for “authenticity.”

Beignets are a yeast dough, so it’s best to start the night before. This way you can let it rise, and cook for breakfast the following morning. You’ll need a cast iron dutch oven, or a pan wide and deep enough for frying, and a skimmer or fry basket.

Beignet Dough

2 1/4 tsp active dry yeast (or a single packet)

3 1/2 c unbleached flour, plus extra for dusting work surface
1/4 c sugar
1/2 tsp salt
1/2 tsp ground nutmeg
2 tbsp shortening
1 egg
4 0z evaporated milk
3/4 cup cider
1 liter oil for frying *

Glaze
1/2 cup powdered sugar
2-3 tbsp cider
1/2 cup maple sugar **

Bring 3/4 cup cider to 100-105F in a saucepan over medium heat. Add yeast and sugar, stir. Remove from heat and let yeast get frothy, a few minutes. In the mixing bowl of a stand mixer (you can do this by hand, just use a large bowl), beat the egg, add salt, nutmeg and evaporated milk. Pour cider mixture to the egg mixture and mix on low speed. Using the dough hook on your stand mixer, add half of your flour, and continue to mix on low speed. Once it starts looking like dough, add the shortening and mix for about 2 minutes, until it is combined. Add the rest of the flour, 1/2 cup at a time, until the dough is smooth. If your dough is still wet or sticky, add a few tablespoons of flour at a time until the dough is smooth, and sticks to your dough hook. Turn the dough out of the bowl, knead a few times on a well-floured surface. Lightly oil the bowl, and return dough to bowl, cover with a tea towel,

Now we’ll let that dough rise. If you are going to leave it overnight, put it in the fridge to keep the rise slow. If you want to cook these up the same day, put in a warm, draft-free place (like an oven), for 3-4 hours.

Once the dough has doubled in size, punch it down (my favorite part! so satisfying. WHAP. take that ninja punch). Preheat your oven to 200F, or the lowest setting possible. Turn dough onto a well floured surface, and roll out to about 1/4″ thick.
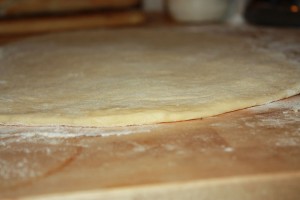
beignet dough

Cut into 2″ square strips with a sharp knife. Place onto baking sheets (with parchment paper, or floured, to prevent sticking). Turn oven heat off, and place baking sheets in barely-warm oven. Let rise again, for about 40 minutes. The beignets will puff up nicely.
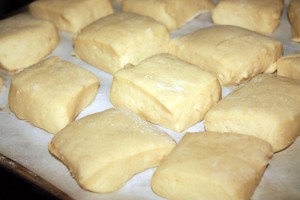
beignets after second rise

While you are letting the beignets rise, you can mix the glaze. In a small bowl, whisk 1 tablespoon of cider into 1/2 cup powdered sugar. Keep adding 1 tablespoon of cider at a time, until the glaze is slightly translucent.

Heat oil in a cast iron dutch oven on medium heat to 350F-360F. I’ve found that if you crank the heat up to high, it’s harder to maintain an even temp. It does not take long for most fry oils to reach this heat, so watch it carefully. Add 4-5 beignets at a time, lowering gently into the oil with your skimmer. Flip frequently, every 30-45 seconds, and remove when both sides have achieved an equal brown. Place on a paper-towel lined plate to drain. Repeat until all your dough is cooked. The beignets continue to cook a bit after you’ve removed them from the oil, so let them sit a few minutes before you start “testing.”
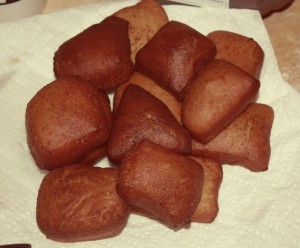
beignets fried

Now, dip one side of each beignet into the cider glaze, then sprinkle maple sugar with your fingers.
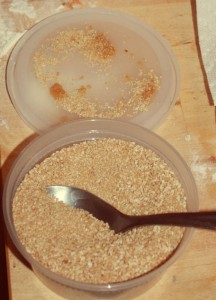
maple sugar

Eat. Save some for your friends (if you want). The result was a mild apple flavor. I’ll be “testing” these again with some shredded apple, and/or a recent batch of apple brandy apple butter.

cider beignet with maple sugar

* Cottonseed oil is the traditional oil for beignets, but I couldn’t find it up north. I used peanut oil.
** Maple sugar is probably hard to find. We were lucky enough to find it at Sherman Market. I’d guess you could mix some maple syrup into a raw sugar (larger granules) and dehydrate? Or order online.
Posted in cooking | 1 Comment