Ain’t it Peachy

A few years ago, when I had just started canning, a neighbor passed on a recipe from the 1951 New York Times for brandied peaches. I make them every year, and they make a great gift, or a nice addition to many meat-based dishes.

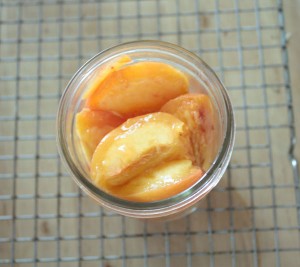
bowl of peaches

You’ll need a stock pot to blanch the peaches, a cold water bath in a large mixing bowl, clean jars with lids and a pot to process the jars in a water bath.  These instructions assume you through processing 3 lbs of peaches, but you can easily scale this recipe.

Take each peach and use a paring knife to cut a shallow X on the bottom of the peach.

Blanch the peaches for 1 minute in boiling water, and immediately submerge in the ice water bath.

Remove the skins, which you can do easily by hand after they are blanched.

removing peach skin

Cut the peaches into quarters or slices, removing the pits, and place in clean jars.

Take 3 cups of the blanched water, add 3 cups sugar, and bring to a boil (for scaling, you’ll need equal parts sugar/water and about 1 cup of each per pound of peaches).  Stir will wooden spoon until sugar dissolves, just a minute or two. I add the peach skins to this syrup while its boiling and then strain for extra flavor, but this is optional.

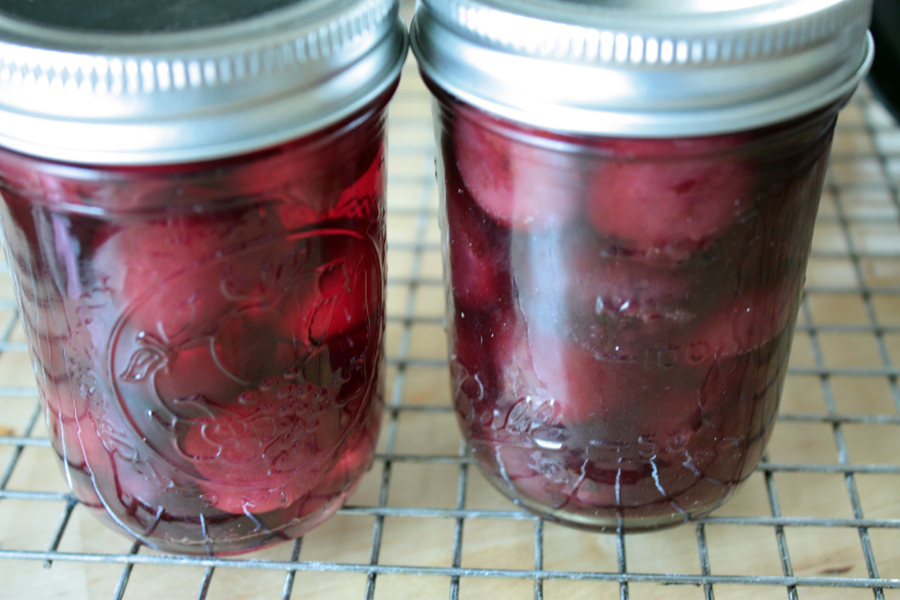
Pour syrup over jarred peaches, filling about 2/3rd of the glass below the headspace. Top off with brandy. Remove any air bubbles, wipe rims and add lids and bands.

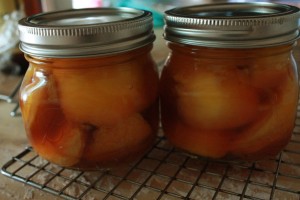
Process in a hot water bath for 20 minutes, or in a pressure canner at 15 psi for 11 minutes. Allow to cool completely, store in a cool dark place.

brandied peaches

So, what to do with all these jars, assuming you keep a few for yourself (and you should)? Pull them out on a cold winter night with some pork chops, a cup of chopped nuts, and a bit of extra brandy.

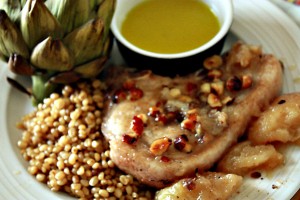
Pan sear the pork chops on high heat in a bit of olive oil, reduce heat to medium temp, and cook until internal temp reaches 170F (the time will depend on how thick your chops are). Add nuts (hazelnuts or walnuts work well for this) and 1/3 cup brandy. Slowly dip one side of your saute pan towards the burner, allowing the brandy to catch fire. Right the pan, allow flames to finish. Don’t worry, the flames only last a few seconds, but will feed your inner pyro for much longer. If you’ve got an electric stove, you could use a long, lit match to flambe the chops.

brandied pork chops with peaches

I served the pork chops with some wheatberries and a steamed artichoke. Put those peaches right on the plate with the chops.

Maybe some day I’ll stop canning every little thing in booze (peaches! cherries! watermelon rinds!), but canning and liquor are two things I adore, so I see no reason to stop. In fact, I’ve been starting to infuse liquors and cordials, which requires less fruit and more booze. So bottoms up, or even better, fill your jars!

Posted in canning, cooking | Leave a comment

What I did this summer…

Obviously, this did not include blogging. I did manage to put up plenty of tomatoes and peaches, though, which are my favorite summer foods. I grabbed around 30lbs of tomatoes at the farmer’s market, and 13lbs of peaches from Carlson Orchards Pick-Your-Own in Harvard, MA.

pasta bowlLots of tomatoes were canned as sauce in my pressure canner, others got thrown into braises, over pasta, even into pie, but my go-to method for preserving that sunny tomato flavor is slow roasting. Slow roasting is slow, and some folks aren’t comfortable keeping a gas oven running the required 6-8 hours. I did try throwing some sliced toms into the dehydrator, but I wasn’t happy with the taste.

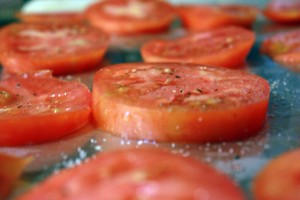
Here’s what I recommend: Slice tomatoes a half-inch thick, spread them on a baking sheet, and flavor with salt, pepper, rosemary or any herbs you like, and spritz with olive oil.

slow roasting tomatoes

Put them in the oven at the lowest temp possible – here’s where my cranky oven gauge comes in handy! I set it at 200F, and it warms up to about 160-180F. If you have the misfortune of an accurate oven, and like most modern ovens it doesn’t read lower than 200F, you can keep the door cracked open a smidge. An internal oven thermostat can be picked up for a few bucks at the hardware store so you can get an accurate read. Now, just wait til these tomatoes are reduced by almost half, not as small as sun dried tomatoes, but the moisture should be removed. In my experience, that’s taken 6-8 hours.

Let cool, then stack into freezer bags or mason jars, be careful to remove as much air as possible and freeze. Throw them into sauces or saute as needed.

Tomorrow: updating a classic peach recipe!

Posted in canning | Leave a comment

Canning with Booze: Cherries Two Ways

I like cocktails with a built-in snack: a Pimm’s cup with cucumber spears, a gin martini with lots of olives, a Bloody Mary with as much veg as I can fit in the glass (celery and cornichons!).  And cherries, too. Sadly, store-bought maraschino cherries are terrible, over-sweetened, rubbery little things. Historically, maraschino cherries means a specific variety of cherry (Maraska, from Croatia and Italy) preserved in Maraschino liqueur (made from Maraksa cherries). Now, what’s sold as Maraschino cherries are dyed red, and soaked in brine and sugar. Which sounds more appealing, really?

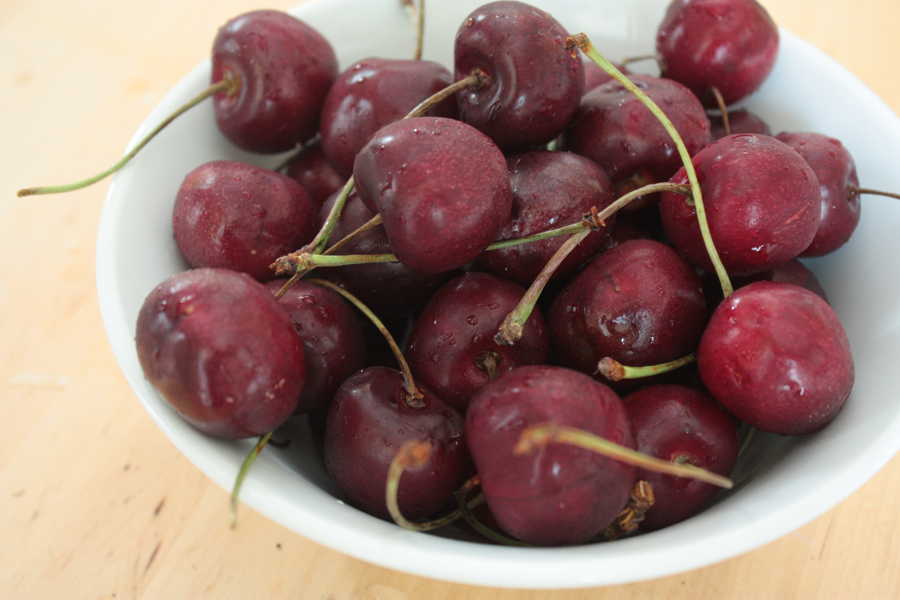
cherry bowl

I had two drinks in mind when I decided to preserve a pound of cherries from the farmer’s market this week – a Manhattan, and a Last Word. Ok, a Last Word doesn’t require a cherry, and I’ve only seen it served that way on occasion, but it is my favorite classic cocktail with maraschino, and I’m going to serve mine with a cherry.

I prefer rye (instead of bourbon or whiskey) in my Manhattan.  While I think the maraschino cherry (with hints of cherry and almond) would go nicely with the well-balanced Last Word, I wanted a rounder, fatter flavor for my Manhattan cherries, so it wouldn’t get overpowered by the rye. I remembered a recipe a friend had shared for brandied cherries, and decided it was worth a try.
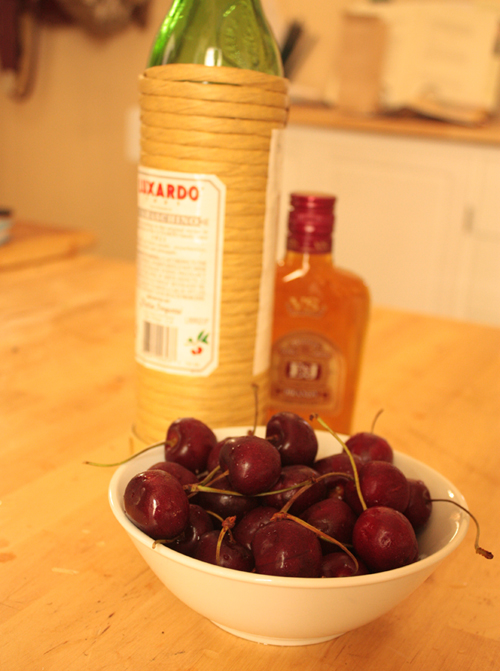
cherries with maraschino and brandy

So, here’s my cherries two ways. Each half-pound of cherries makes a pint. Make sure to sterilize your jars and simmer your lids, even if they’re going straight to the refrigerator.

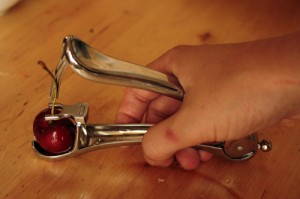
I did have the good fortune to borrow a cherry pitter. You could give it a try manually, with a chopstick, but this tool allows you to push the pit straight through while keeping the cherry more or less intact.  Though, as you can see, there’s a fair bit of splatter from the process, so you’ll want to keep a sponge handy.

cherry pitter

MARASCHINO CHERRIES

1/2 lb cherries, pitted
1 cup maraschino liqueur

Bring cup of maraschino liqueur to a simmer. Add cherries, turn off heat, and let sit until cool. Scoop cherries into jars, and then pour liquid over the cherries. Seal with lids and bands. Refrigerate.

BRANDIED CHERRIES

1/2 lb cherries, pitted
1/4 cup brandy
1/4 sugar
1/4 cup water
cinnamon stick
dash of lemon juice

Combine water and sugar in a saucepan, bring to a boil. Add cinnamon and lemon, stir until sugar has completely dissolved. Add cherries, simmer on low for 5 minutes. Turn off heat, remove cinnamon and add brandy. Let cool, scoop cherries into jar, and pour liquid over them. You can top off with more brandy if necessary. Add lids and bands, refrigerate.

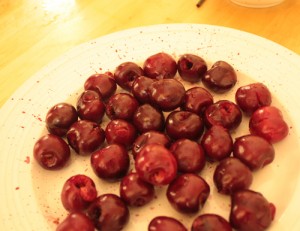
cherries in jars

Last Word
1 oz Gin
1 oz Green Chartreuse
1 0z Maraschino Liqueur
1 0z fresh squeezed lime juice

Combine in shaker over ice, shake well, until frosted. Strain into 4 oz glass, serve with maraschino cherry.

Rye Manhattan
2 oz rye
3/4 oz sweet vermouth
1 dash aromatic bitters

Combine in tall glass over ice, stir well. Strain into glass, serve with brandied cherry.

Posted in canning | Tagged , | 2 Comments

Buffet Remix: Using Mod Podge on Furniture

I’ve had this decent, though boring, buffet/dresser for about a year. I picked it up for $25 at a used furniture place in Somerville. It’s nothing wonderful, mostly veneer on wood, the hardware on the doors didn’t fit, there were scuffs in the finish. But I remember thinking I liked the shape of the legs, and the molding on the drawers.  And I though, maybe with a coat of paint, I could turn it around.

dresser before painting

Well, I finally got around to working on the piece, and I’m pleased with the results of my Mod Podge experiment. I knew I wanted to incorporate a bit of gray and red into the piece. I picked out a lovely vine/flower paper at Paper Source, picked up a gray paint and TSP at Tags, and got to work.

First, I used TSP dissolved in warm water and cleaned the entire piece and remove the finish on the veneer. I roughed it up with a bit of sandpaper, and wiped it down to remove any dust.

I had hoped that I could remove the panels from the doors to attach the paper, but those suckers weren’t coming off. So, I had to apply the paper with the doors attached. I’d recommend applying modpodge to the surface, not the paper or fabric, and as thin a layer as possible. Once the paper was attached and lined up, I spread a layer on top to seal the deal.

dresser with papered doors Once the paper and Mod Podge was completely dry, I trimmed any excess with an exacto knife. If the paper is wet or damp, it will tear. Next, I removed the hardware from the drawers, and covered them with red enamel. I painted the entire surface with gray paint, and then with a gray deck stain for a weathered look (letting the surface dry between coats, of course). And finally, I lightly sanded the corners and edges with a fine sandpaper to make sure the piece showed its age with dignity.

distressed edges with sandpaperAnd here’s the final result. All told, about $50 in supplies for this makeover.

finished dresser with paper and paint

Posted in furniture | Tagged , | 6 Comments

Dog Days of Summer, or how to eat more lavender

Somewhere around ’02 I was traveling the Balkans. I flew into Zagreb, Croatia, and out of Beograd, Serbia several weeks later. I followed a well-worn path through the towns of the Dalmatian Coast. Zadar and its white stone walls, the bustling port of Split, and medieval Dubrovnik, where I departed for the island of Hvar.

With its boast of 300+ days of sunshine a year, Hvar’s main source of income are the German and Italian tourists that flood the hotels, demanding beer and gelato. But, on a good day, if you shared a rented flat in a 4th floor walkup, a cross-island breeze could pick up the scent of the lavender fields. Vendors in the town market hock lavender oils and satchels. The finer stuff is sold to perfume makers.

Scents store memories in a way that is more visceral than a photograph or ferry ticket. When I smell lavender, I remember the balcony of that rented flat, terra cotta tiled rooftops, the carvings of St Mark’s lion into Venetian-era buildings.

lavender plantMy lavender plant is in full bloom. It’s hard to walk buy and not grab some. For some people, lavender reminds them of soap and grandmothers, but thankfully my grandmother didn’t wear lavender. So I keep trying to find new ways to add lavender in my cooking.

Dog Days of Summer is a cocktail invented out of necessity last summer. Necessity for gin, mostly, but also lavender. It requires a lavender simple syrup, lemonade, gin, and St Germain.

Dog Days of Summer

  • 2 tsp lavender buds
  • 1 cup sugar
  • 1 cup water
  • St Germain Elderflower liqueur
  • Hendricks Gin
  • Lemonade

Bring sugar and water to a boil in a small saucepan, until sugar dissolves. Add lavender, reduce heat to low, and let simmer for 5 minutes. Remove from heat to cool to room temp, then strain. A tea strainer works great for this. Syrup can be made 1 day ahead.

In a cocktail shaker, combine 2 parts gin (I prefer Hendricks), 1 part St Germain, 1 part lemonade over ice. Shake well, until shaker is thoroughly frosted and some ice has dissolved.

In a Collins glass,  pour gin mixture over ice, and top with lemonade. 50/50 will be nice & stiff, 2/3 lemonade to 1/3 gin for an afternoon drink. Stir in 1 tbsp of lavender simple syrup. Garnish with lemon.

dog days of summer cocktail

Now, one more idea for that lavender plant, if you’ve got one. Bread! I’ve been making no-knead bread on a fairly regular basis over the last month, at least a loaf a week. It’s so simple and easy, just combine the ingredients, and bake the next day.
No-Knead Bread with Lavender and Fleur de sel

  • 4 cups bread flour, unbleached
  • 1 1/2 tsp salt
  • 1/2 tsp instant yeast
  • 2 cups warm water
  • 1 tbsp lavender buds
  • sea salt

Combine dry ingredients in a large mixing bowl. Add water, stir with wooden spoon until flour is fully mixed. Dough will be stringy. Wrap bowl with plastic wrap and let set overnight, 14-16 hours.

When you wake up the next morning, you’ll see the dough has doubled in size and is dotted with holes (if not, your yeast isn’t working. try again with new yeast). Shape the dough, working it into a ball, then folding lengthwise, and then in half again. Re-cover with plastic wrap and let sit for 2 hours.

Pre-heat oven to 450F. Put your dutch oven and the cover (unless the handle is plastic!)  in the oven as it heats up.

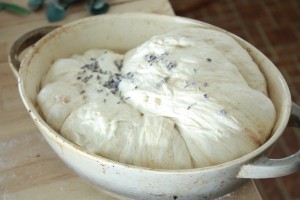
Unwrap the dough, which will have risen. Twist the dough, place in the heated dutch oven. Sprinkle with lavender buds, then fold them in. Sprinkle with sea salt.

no knead dough with lavenderBake, covered, at 450f for 30 minutes. Remove lid, and continue to bake for another 30 mins. Crust will brown and harden.

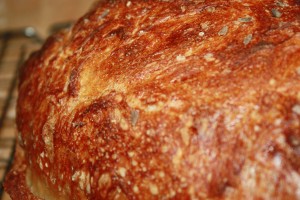
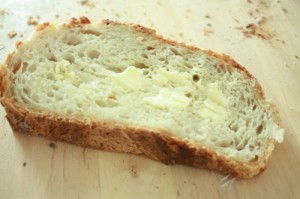
lavender bread crustYou’ll notice the sea salt gives the crust a pretzel-like taste, and the lavender offsets the salty with a sweet floral taste. Let cool one hour before you slice it up. Add butter, enjoy!

Posted in cooking | Tagged , , | Leave a comment

Refrigerator Pickles, or the Virtues of Impatience

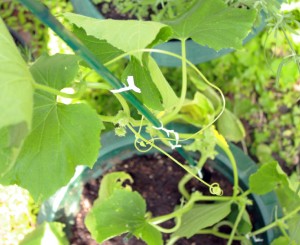
I have a half dozen heirloom cucumber plants in my small city garden that are just starting to grow flowers. Little buds are growing up and down the stems.

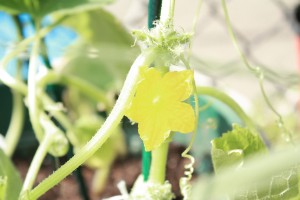
This is the first year I’ve grown everything from seed (I purchased from the excellent seedsavers.org), so it’s been nerve-wracking and rewarding. Yesterday, Clara chased a butterfly around the garden, and today a bumblebee stopped to visit the very first flower on my largest plant.

blossom on cucumber plant So, with all this excitement, and full knowledge that I’ll be swimming in cucumbers within the next few weeks, I really should have been able to resist the itty bitty cucumbers at the farmers market. Obviously I failed. I ate the first little cuke raw, with dashes of salt on each bite.

If you haven’t canned before, pickles are an easy way to get started. First, you’ll need to sterilize your jars and lids.  Never ever ever reuse lids. Don’t even think about it. Not even that once*.

For the lids, add a cup of water to a small saucepan. Simmer on medium low heat, add lids for a few minutes (2-3) to loosen the rubber seals.

Sterilize your jars in hot water for 10 minutes. You can use a large stock pot, but you need a weighted down towel or a steamer rack on the bottom of your pot to prevent the jars from hitting the bottom and cracking. Bring the water a boil, reduce heat to simmer, lower the jars in gently, and keep at a simmer for 10 minutes.

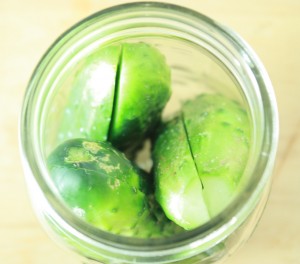
Prep your jars. You can cut up the cukes any which way you like. Sliced coins are easier to pack, but I love whole cukes or spears. These little guys were sliced lengthwise.

cucumber spears in canning jar

Pack the cukes in, then add your seasonings. My mix goes something like (per jar):

  • 1 tsp dill seeds
  • 1/2 tsp peppercorns
  • 2 whole garlic cloves
  • 1/2 tsp cayenne pepper
  • dill fronds

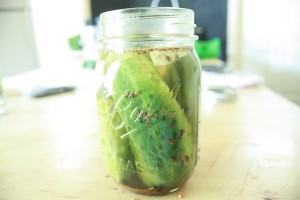
Start your brine. Equal parts vinegar to water, 1 cup total for each jar. I prefer apple cider vinegar, but white will do. Bring to a simmer.  Pour hot brine into jars, leaving 1/2 inch space available in the jar.pickles in canning jarWipe the rims off with a damp towel. If your rims aren’t clean, the jars might not seal. Now, if you’re impatient like me, and you’re going to throw these in the refrigerator for more immediate consumption ( I try to wait 3-5 days to reach appropriate pickleness), throw the lid and band around the jar, and you are done.

But, if you’re creating a large batch for your pantry, you’ll need to place the lidded jars (with bands) back into your stock pot with water at a boil for 10 minutes. When you remove the jars with tongs, let them cool on the counter. You can test the seal two ways –

  1. Pick up the jar by the sides of the lid. If it comes off, it didn’t seal.
  2. Press the center of the lid, and release. If it pops, it ain’t sealed. The seal should create a vacuum.

If your seals are good, slap the bands around them and store the jars in a dark, cool place.

* Lids and the seal are the critical step that should scare you about canning. And, since it’s the very last step, don’t waste  your time and effort trying to save a few cents by reusing lids that won’t reseal most of the time.

Posted in canning | Tagged | Leave a comment

Clafoutis with Canned Plums, Hold the Butter

Usually when I arrive at a dinner with desert in tow, I unveil some fruit tart or galette. My friends dive in, only to reluctantly ask, “how much butter?”

I love a buttery pie crust. My default recipe is Alice Water’s galette dough from Chez Panise Vegetables, which calls for 3/4 cup of butter. When it comes down to the butter argument, I am firmly pro butter, anti margarine or any ‘butter’ substitute. I find ingredient lists containing partially hydrogenated soybean oil far more frightening than the fat and calorie content of butter.

So yes, butter has become an expectation when I unveil a desert. This explains my friends’ surprise last week when I was able to answer the butter question with a brief “none.”

The clafoutis is an egg custard. Eggs, sugar, flour, milk, plus your choice of stone fruit.

Plums aren’t available in these parts til late summer, so I popped open a jar of plums canned last summer using Food in Jar’s lovely recipe with honey.

I added a bit of cardamom when they were canned, which gave the plums a bit of spice and earthy flavor. In my first experiment, I used a handful of whole cardamom pods. I was concerned when the pods swelled up in the jars over the first few weeks. So, I *had* to open the jars and pour them over ice cream. They were lovely, but I was glad that I opened them early on, as the plums were strongly spiced. Next time, I crushed 3 pods with a mortal and pestle for each jar.

Clafoutis

  • 5-6  plums,  halved
  • 3  eggs
  • 1 cup  milk
  • 1 1/2 tsp vanilla
  • 1/3 cup granulated sugar
  • 1/2 cup flour
  • 1/2 tsp salt

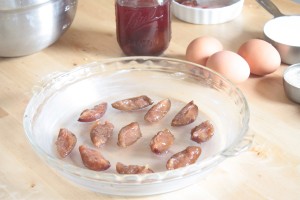
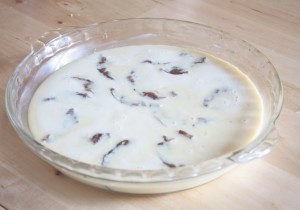
Preheat oven to 350F. Lightly butter a 9″ pie dish. Scatter the plum halves in the dish. In a medium bowl, mix the eggs and sugar.  Slowly pour the milk in, still mixing. Add the vanilla and salt, mix until color is even. You can sift the flour into the mixture, or just add in small amounts, mixing as you go. Once the flour has been worked in, slowly pour the batter of the plums. You’ll notice the plums will move and float.

clafoutis batterPop in the oven in a middle rack, bake for about 40 mins. The clafoutis will swell, especially the edges. Watch for browning, turn the temp down if the edges start to burn.

Remove from oven and allow to cool to room temp, about an hour. The edges that have swelled will settle in, and the custard will be set, not jiggling.

And there you go, a rich desert, with no butter!

Posted in cooking | Tagged , , | Leave a comment

Garlic Scapes

It’s nice to see something that would normally be tossed away getting good use. Garlic scapes (the stalk of the garlic plant) are showing up at a number of the stands at the farmer’s market.

The easiest thing to use scapes for is pesto. Obviously, this will have a strong garlic flavor, but I found the taste of the scapes less sharp than raw diced garlic.

Garlic Scape Pesto

  • one bunch (dozen or so) garlic scapes
  • 1 cup olive oil
  • 1/3 cup pine nuts
  • hard cheese (pecorino romano, eg), enough for 1 cup shredded
  • lemon juice

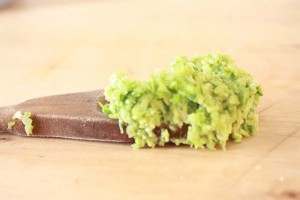
Grate the cheese or shred using your food processor and set aside. Roughly chop the garlic scapes into 2-3 inch pieces. Puree the scapes in your food processor. You’ll find the scapes blend easily into fleck-sized pieces. Add the cheese, pine nuts, then oil to the scapes and puree until the cheese and pine nuts are dissolved. Add a squeeze of lemon juice.

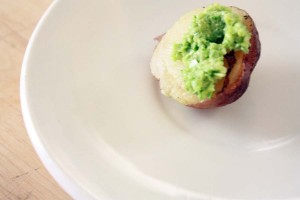
garlic scape pestoGarlic scape pesto has a great texture, as well as punch. I couldn’t resist putting a bit on one of yesterday’s roast potatoes.

garlic scape potatoWhile this is called a pesto in name, I found it to be a good, sharp replacement for guacamole. Avocados aren’t going to be grown in New England any time soon, so give it a try as a spread or dip if you’re trying to eat local.

I managed to throw some pesto on my next leftover lunch with the roast chicken. I sauteed a few cherry tomatoes from the market, added chicken and garlic scape pesto over a few toasted corn tortilas. Mexican food, locavore style.garlic scape pesto chicken tortilla

Posted in cooking | Tagged | Leave a comment

Return of the Farmer’s Market, and a summer Roast Chicken

Summer has arrived, and I’m so pleased the Union Square Farmer’s market is in full swing. My Saturday morning routine has been restored – off to Sherman Cafe for coffee, dog and I play frisbee at Nunziato, and then hang out with  neighbors and friends at the farmer’s market.

I was happy to see carrots and leeks make their debut this week. While I try to avoid firing up the oven on a hot summer day, these cute little roots were perfect for a roast.

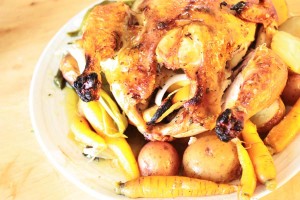
Herb Roasted Chicken with Lemon

  • 1 4-5 lb whole chicken, giblets removed
  • 1/4 cup butter, room temp
  • 1 1/2 tbs mixed dried herbs (I prefer a blend of lavender, thyme, sage, rosemary)
  • 1 lemon, thickly sliced
  • 12 baby carrots, scrubbed and trimmed
  • 6 spring leeks, washed, split lengthwise
  • 4-5 baby potatoes, blanched and halved

Melt butter in a small saucepan on medium low heat. Add herbs, stir for about 1 minute. Remove from heat, and chill. Can be made 1 day in advance.

Preheat oven to 400F. Wash the chicken and pat dry. With your fingers, separate the skin from the chicken breast. Rub butter between skin and meat, all over the bird. Very lightly rub any extra butter on top of skin – if you add gobs of butter, it will brown too quickly. Add salt and pepper to cavity, then fill with lemon slices. Place vegetables in the bottom of a roasting pan, dust with salt and pepper. Add 2 cups water or broth, not so much that the veggies are covered. Place rack over vegetables, and the chicken on your rack, breast up. If you don’t have a roasting pan, you can use a casserole dish, just place the chicken directly onto the vegetables. Roast for approx 30 minutes, then tent with foil. Roast an additional 45-60 minutes.

A note on cooking times – a decent instant-read digital thermometer is less than $20. If you plan on roasting anything, just get one. Chicken should be roasted to an internal temp of 190F.

Nothing is better for leftovers than a roast chicken.  First, after carving the bird, I take the carcass, along with some veggies (celery, onions, carrots), salt, peppercorns and cover it with water in a large stock pot, and bring to a boil. Reduce to low heat, and simmer for 45 mins. Strain into containers (tupperware or canning jars) and stick in the freezer. This is a great base stock for soups or sauces.

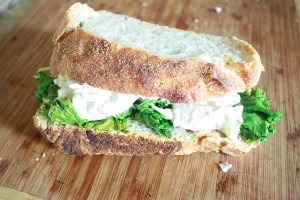
My favorite use of leftover chicken in the summer is chicken salad. My carving skills are less than elegant, so I often end up with a cup or so of shredded bits of meat. I chop this roughly (with skin!), add 2 tbs mayo, the juice of half a lemon, and dried cranberries if I have any.

Placed on home-made bread, with a bit of kale cooked in garlic, this is the ultimate chicken salad sandwich.

More on leftovers tomorrow!

Posted in cooking | Tagged | Leave a comment